SVOCat Documentation

Version 0.5, June 2016, author: Carlos Rodrigo

HomeDownloadDocumentationExamplesCreditsHelp-Desk
1. Introduction
2. Download
    2.1. Extract
    2.2. Permissions
3. The files
4. Example
5. Configure
    5.1. First
    5.2. Project
    5.3. Mysql
    5.4. Web
    5.5. VO Curation
    5.6. ConeSearch
    5.7. Fields
    5.8. Photometry
    5.9. Search Opts.
    5.10. File Paths
    5.11. Scripts
6. Web Design
    6.1. style.css
    6.2. Colors
    6.3. header.php
    6.4. footer.php
7. Extra tips
    7.1. MOC files
    7.2. VO registry

Web page design

You can use this application as it is once you have configured it. The main web texts and logos can be changed through the administrative interface so that it reflects the main characteristics of your project.

But, in any case, we have tried to make the web page design as simple and structured as posible so that it's not difficult to change it as you need.

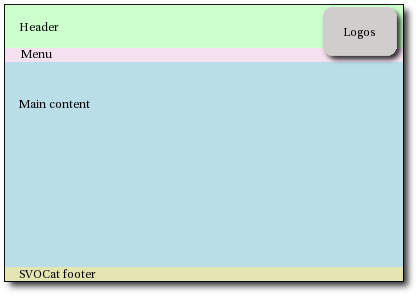
The page layout is composed by 5 main layers:

  • Header: the top layer, containing title and subtitle.
  • Menu: a thin layer below the header. It contains the web page menu.
  • Logos: a layer containing the logos. It is positioned over the header and menu layers, on the top right corner of the page.
  • Main: this is the area where the main content of the page is located. Depending on the menu item selected, the homepage, news, documentation or data retrieval pages are shown here.
  • SVOCat footer: this is a thin layer shown at the bottom of the page. It displays a link to SVOCat.

If you want to customize the look and feel of the web page you can do it just by editing the files available in the "style" folder. In order to do this you will probably need some knowledge about CSS and even a little PHP (depending on what you want to change). We will give here some tips about it.

Customizing: style.css

If you decide to customize the look at feel of your web page, it could be enough to change the style/style.css file.

All the styles used in the public web page are defined here.

If you are used to working with CSS style sheets you will know what to do. If not, you maybe want to learn a little about it (see, for instance, W3C page about style sheets) but, in any case, you could be satisfied changing just the color of some elements in the page, which is quite easy.

If you take a look to style/style.css you will see that it is quite simple (we show here only an schematic structure, look into the real file for the details).

In summary:

  • We set some general properties for the web page: body (default font, background, etc), for the links (a) for headers (h2) and form elements (select, input, textarea, button).
  • Then we define styles for the different layers:
    • Header: header itself, menu and logos.
    • Main content area.
    • SVOCat footer.
  • We define some special styles for displaying some special kind of texts (command-like texts, errors, text in smaller font).
  • And finally some styles only to be used for specific contents:
    • Home page: the different layers contained in the home page.
    • Search (Data Retrieval): styles for the search form and list of results.
    • News page.

Just changing colors

If you just want to change some colors in the web page, look in the style/style.css file for color definitions. You will find them as: "color" (for font color), background or background-color (for background color) or in some "border" definitions (for line color).

Colors are specified as things like #abc, it is, a "#" symbol followed by three characters. Those three characters represent a color in RGB format. That means that the first number is the amount of Red, the second the amount of Green and the third the amount of Blue. These amounts are writen as hexadecimal numbers (where 0 is minimum and f(16) is maximum). For instance:

  • #000 is "nothing of red, nothing of green, nothing of blue", and the result is: black.
  • #fff is "maximum of red, maximum of green, maximum of blue", and the result is: white.
  • #ff0 is "maximum of red, maximum of green, nothing of blue", and the result is: yellow.
  • #f80 is "maximum of red, 50% of green, nothing of blue", and the result is: orange.

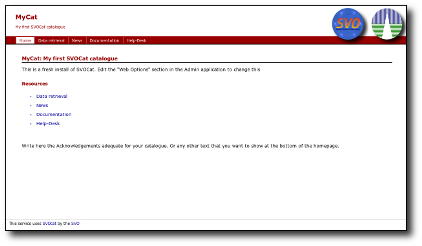
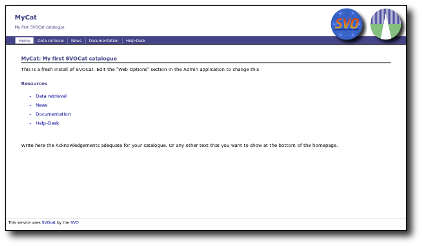
You can try some combinations using numbers and letters (a,b,c,d,e,f) and see what you get.

Given that the web page design is simple, I would guess that, if you want to change colors, you will want to change the often used "Red" colors (menus, titles...) to some other color. Let's imagine that you want a mostly white-and-blue design instead white-and-red. You will want to change:

  • h2 → color: #900; to color: #447;
    (to change all the big titles)
  • #cat_div_header h3 → color: #900; to color: #447;
    (to change the small subtitle in the top header)
  • #cat_div_menu → background-color: #900; to background-color: #447;
    (to change the background of the menu)
  • .cat_menusel a color: #900; to color: #447;
    (to change the color of the link in the menu when an item is selected)
  • #cat_div_main h3 → color: #900; to color: #447;
    (to change all the small titles in the content)

and we get a more bluish look:
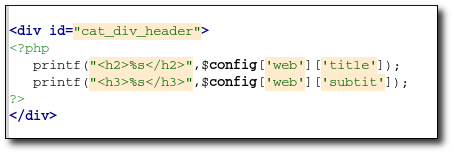
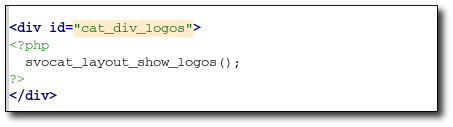
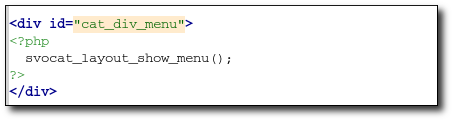
Customizing: header.php

In the file style/header.php we define everything that is to be shown before the main content. That is: header (title, subtitle), logos and menu.
First we show the "cat_div_header" layer (with title and subtitle).
Then we show the "cat_div_logos" layer (with the logos). In practice this is generated by an special function using the configuration that you set in the administration tool. You probably don't want to change anything here.
Then the "cat_div_menu" layer (with the menu). In practice this is generated by an special function using the configuration that you set in the administration tool. You probably don't want to change anything here.
Finally we start the "cat_div_main" layer where the main content will be displayed. This layer will be closed later in the style/footer.php file.

One posible change that you could want to make here is changing the text title and subtitle on the top-left corner by some image. If this is the case you could do as follow:
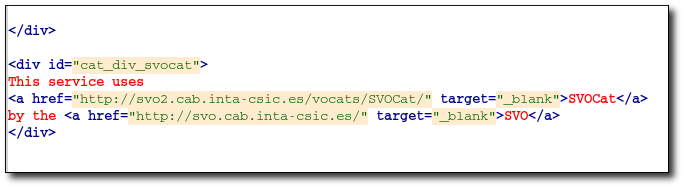
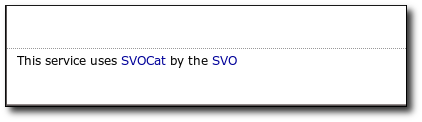
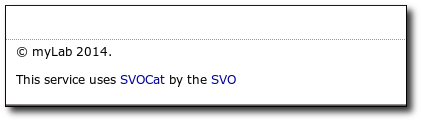
  • Take your title image and save it in the style/images/ folder. In our case we have done some fancy title image named "othertit.png".
  • Edit the header.php file as this:

    and you will get the fancy image as title:

Customizing: footer.php

The file footer.php makes the actions that must be performed at the end of the page (after showing the main content)

  • First we close the main content layer
  • and then we show the SVOCat layer telling that SVOCat has been used here.

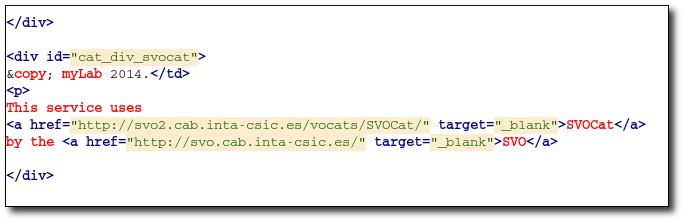
But you could want to add your own text:

and you get the new footer:

Or even drop the SVOCat line (if you do so, please send us a note saying that you are using the application so that we know it and we can see that our work is being useful for somebody).